
Follow this tutorial and learn how to recreate the example shown below. It’s a simple tutorial and a beginner can follow. Follow this tutorial, if you have any questions feel free to email us

Step 1:
Create a new document. First click on the “Type Tool” shown below.

When you select the “Type Tool” type some your name or the text you are trying to recreate.

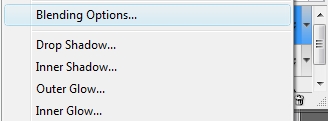
Right click the layer that the text is on and select Blending Options as shown below.
With the blending option selected. the Blending option window should open up, select Gradient Overlay.
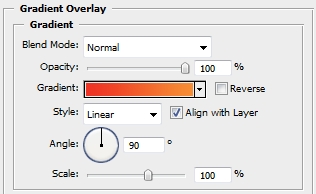
Double click on the Gradient which will bring you to the window below.
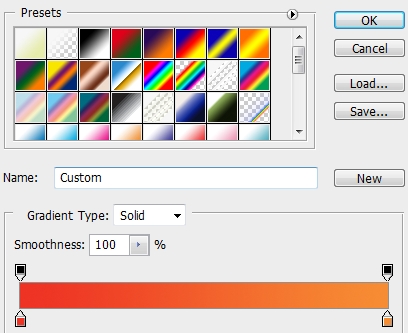
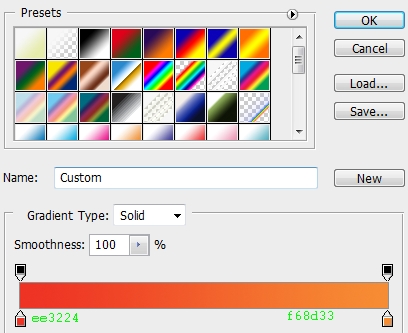
Click TextEffect and download the gradient effect and load it into adobe. Or you can recreate it using the colors below.
At this point you should still be in Blending Options, click on Stroke and apply the settings below.
With that your text should look like the example below.

Step2:
Create a new layer below the text layer. Change the foreground color to #393934. Click on the Rounded Rectangle Tool using the setting shown.

and create the shape under the text.

Now hold Ctrl and click on the text layer to select the text.

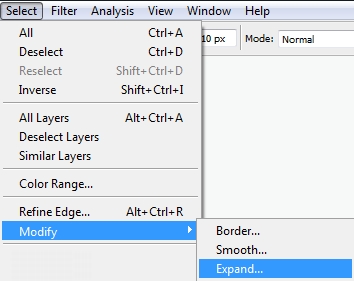
Still on the Rounded Rectangular layer, Click Select > Modify > Expand
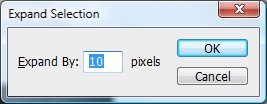
Change the Expand Selection to 10 pixels
Doing this will give you the effect below.

Press Shift+Ctrl+I
Now press Delete on your keyboard. Doing this will give you the effect below.

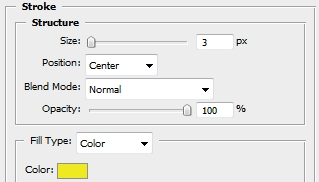
Go into Blending Options and add the stroke setting shown below.

Click OK to add the setting and you are finished.


