
Learn how to create a simple ribbon using adobe Photoshop. It is a simple effect for beginners using rectangular shapes and different shades of one color.

Step 1:
Create a new document. Create a new layer an name it, Ribbon1. First click on the “Rectangle Tool” shown below.

When you select the “Rectangle Tool” the menu below will come up. Make sure the option you selected is the same as in the screenshot.

Create the rectangle shown below using this color #474ca0.

Create a new layer below the previous layer and name it Ribbon Mid, using the dark blue color below #2a2b6a. Create the rectangle shown

Click on the Polygonal Lasso Tool
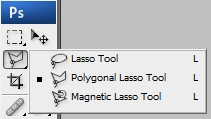
Make sure that the new selection option is selected
Using the Polygonal Lasso Tool draw the selection shown.

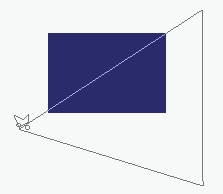
After you complete the selection press delete and you should have the example below

Now position the shape to get the effect below.

Step2:
Create a new layer below the Ribbon1 and Ribbon Mid-layers, you can name this Ribbon End. Change the foreground color to #393934. Click on the Rectangle Tool and create the rectangle shown.

Create a New Layer above the Ribbon End layer.
Click on the custom shape tool and select the arrow shape shown below.

Using the Chop Tool right click on the shape as show and rotate it.
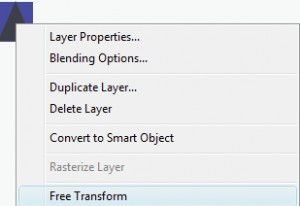
You can rotate the shape by changing the angel to -90

Click enter or the check to commit to the change.

Position the shape and click on the layer to select the shape as shown below.
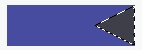
Now press Delete on your keyboard. Doing this will give you the effect below.

Position this to get the effect below and you are finished.


