Introduction: In this tutorial I will teach you how to create a burnt paper effect using blending options and different brush settings. If you are having problems feel free to e-mail us, or post a message

Step1: Setting up work space.
Create a new image using the dimension 800 x 600. Set the background color to #FFFFFF. Create a new layer, Layer>New> Layer… (Shift+Ctrl+N).
Step2: Copy and paste image.
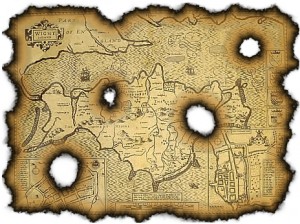
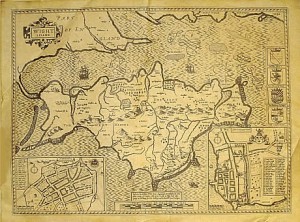
Copy (right click copy) and paste (right click paste) the image below into Photoshop. The map I used below, I found on oldmap.co.uk.
After pasting the image into Photoshop. Right click on the maps layer, click Blending Options and add the settings shown below.
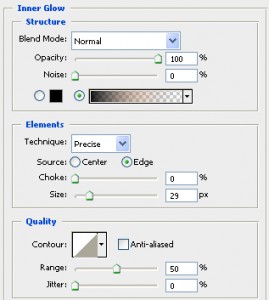

Click ok, to apply the settings.
First, click burnt edge and download this brush set. The name of the brush is Burnt edge. Install it into Photoshop. Click on the Erase Tool, when you do that on the upper right-hand side of the taskbar you will see this icon click on it and it will bring up the window below.
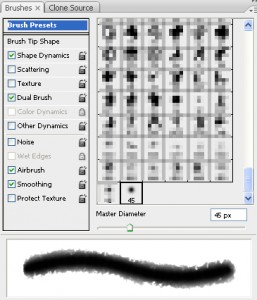
Click on select the Burntedge brush; when you do that, the Shape Dynamics, Dual Brush, Airbrush, and Smoothing should be selected.
Using the Erase Tool start erasing the edges of your image until you are satisfied. Below is what I came up with.

Using the same brush, spend some time to clean up the edges. By going over the edges couple times, until you are satisfied.
Finished:
Well, that is it; I hope it came out to what you expected. If you have any questions or comment about this tutorial, feel free to post a message.