Create an interface wire holder using Photoshop.

Introduction: In this tutorial, I will teach you how to create an interface wire holder. If you are having problems feel free to e-mail us or post a message.

In this tutorial, I will teach you how to create the interface effect above.
Step1: Setting up the workspace.
Create a new image using the dimension 800 x 600. Set the background color to white, this can change depending on where you want to place the Tag. Create a new layer, Layer>New> Layer… (Shift+Ctrl+N).
Step2: Creating the wire holder.
Name the new layer, Faceplate. This is just something simple to pace the “Wire Holder” on to. Click on the Rounded Rectangle tool and create the shape shown below.

With that, right click con the “Face Plate” Layer and apply the Blending Option shown below
Click ok, to apply the setting. Create a new layer, Layer> New> Layer… (Shift+Ctrl+N).You can name this layer Base, Click on the Ellipse and create the shape shown below.

Right click on the Base layer, click blending Options, and add the settings below.
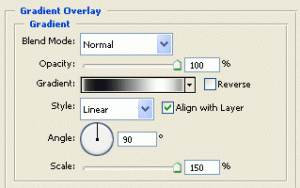

Click ok to apply the settings. With that you should have the effect shown below.

Create a new layer, Layer> New> Layer… (Shift+Ctrl+N). Name this layer pipe. I know some of the layer names don’t relate to the tutorial. I just name them to make it a little easier;p. Anyway click on the Rectangular tool and create the rectangle shown below. You can Zoom into your image to get a better view if you want.
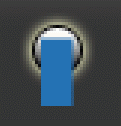
Now using the Pen tool and draw a selection around the rectangle shown below.
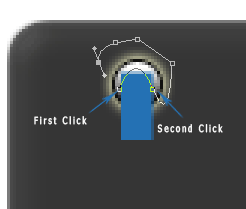
On the second click, Hold the mouse down and drag to create the curve effect. With that close the selection and still using the Pen tool right-click and select the option shown below.
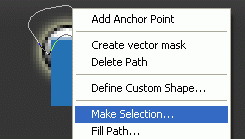
Leave the Feather Option at 0, click OK and you should see the selection below.
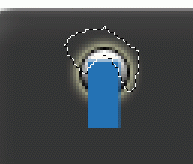
Hit the Delete key, on your keyboard and zoom out of your image. Right-click on the pipe layer and add the blending options shown below.
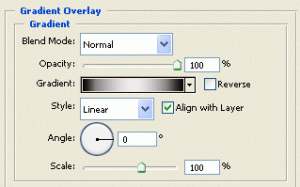

With that you should have the effect shown below.

hold Ctrl, and click on the pipe layer to select it as shown below.

With that image still selected, click on the Base layer and press delete. With that you should have the effect below.

Create a new layer, Layer> New> Layer… (Shift+Ctrl+N). Name this layer clamp. Using the Rectangular Marquee Tool create the selection shown below and fill it with any color using the Paint Bucket
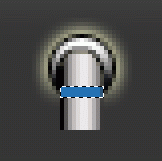
Right click on this layer and apply the settings shown below.
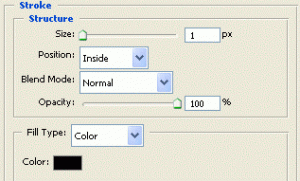
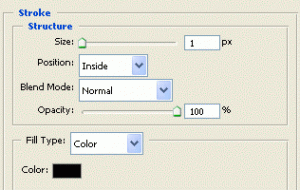
Click ok, with that you should have the effect shown below.

Duplicate the clamp layer and drag it down to get the effect shown below.

Create a new layer, above the Face Place layer. Name this layer Wire, Using the Rectangular Marquee Tool create the selection shown below and fill it with blue color using the Paint Bucket. The color does not matter.
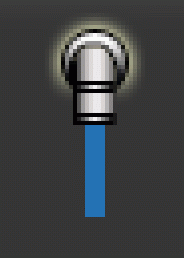
Right click on the wire layer, and apply the blending options shown below.
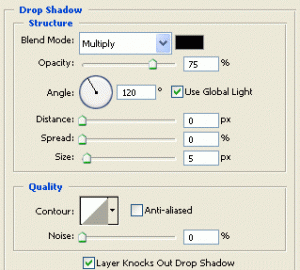
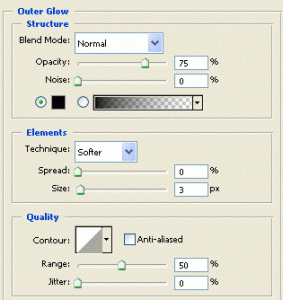

Click ok, and with that you should have the effect shown below.

Hold shift, click and select layers Base, pipe, and clamp layers. With the layers selected, Duplicate the layer, by right-clicking on the layer and selecting Duplicate layer as shown below.
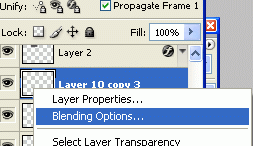
With that layers duplicated and highlighted press Ctrl+E to merge the layers.

With that, you should have the effect above. Using the Chop Tool right-click on the layer you just created and click Free transform.

Change the Height to -100% this will flip the “holder” around, to get the effect below.

Finished:
Well, that is it, hope it came out to what you expected. If you have any questions or comment about this tutorial, feel free to post a message.


